Showing posts with label chicken. Show all posts

Wednesday

Whole Chicken Meal(s)

In my family nothing goes to waste. We currently live in California and between the chickens, the three kids and my husband, all food is consumed. Nothing is thrown out,  unless it's molded over. And then we have a proper burial and vow to now neglect said food again.

Really though, every meal is fixed and eaten for leftovers or re-purposed for another meal. So in light of this re-purposing, I thought I would do a few meals with one WHOLE chicken. These meals will feed 5 people and will only consist of ONE chicken.

First day: Chicken in the Crockpot

All of these re-purposed meals start with 1 whole chicken in the crockpot. Alternately you can use chicken pieces (like bone in thighs, drumstick, breasts etc) and do the same idea, but I use a whole chicken.

Usually I tell people that cooking chicken in the crockpot is the best and easiest thing you will ever, ever do. And it's so easy (and way better for you in fact) that you should do it at least once a week! However, some people can't handle that much chicken. BUT I've gotten a lot of questions about HOW to do the chicken without overcooking it. Simple solution is a crockpot with a probe, like this one (Click to see larger):

Not only is this crockpot programmable but it's got a temperature probe and when your chicken reaches desired temp it will turn to WARM! You will never have overcooked chicken again! SO BRILLIANT!

I digress.... ;)

So what you will need (besides a cool crockpot that turns itself off):

1 Whole Chicken with Giblets (trust me on this one, you won't eat them, but you will use them) 6-8lbs
Chicken seasonings of your choice (or if pick one of mine, use BEST CROCKPOT CHICKEN first)

Place defrosted chicken into the crockpot upside down. Cover with seasoning then flip over and cover the top. Place lid on crockpot and if you have a probe, stick it into the breast, closest to the bone but not touching. If using the program, set it for 160 on low. This should take 5-6 hours, but count on it being done sooner so it can continue to sit there and reach the final temp of 180 (fully cooked but not dry chicken). If you set your probe for 180 it will ultimately go over and dry your bird out. If you want to cook on high it's 3-4 hours, but I never recommend a chicken on high. Even with a probe. It looses some juicy.

With this meal I usually serve white rice (I know, boring but when cooked when chicken broth, it's amazing) and a veggie. It's key when you know you are going to re-purpose a meal that you pick things you can cook ahead and re-purpose for your next meal.

So remove ALL of the meat from the chicken bones but leave the bones (and chicken fat and giblets, unless you like eating those) in the crock pot. Cut the extra chicken into bite sized pieces and store for tomorrow.

Also, make 2-3 cups MORE dry rice then you need. You can either put this into your Chicken Rice Soup meal, or the Chicken Taco meal. So save your left overs for tomorrow.

First day: Chicken Broth

A lot of people don't realize that chicken broth is so incredibly easy to make at home and almost free! You know those bones you just picked clean? Add to the crockpot:

1 onion
2-3 rough cut carrots (or the peels and ends of carrots you saved from the last time you needed carrots)
1-2 ribs of chopped (or the cleaned ends and leaves of the last batch of celery you used)
2-3 bayleaves
Salt and Pepper
Optional: 1 Tablespoon Apple Cider Vinegar (If you want more nutrition from your broth, use it!)

Fill the crockpot with water (up to the rim) and set it on high. You can cook this for 8-24 hours depending on how rich you want your broth to be. I try to cook mine no less then 24, but often I'm in a hurry to get the broth done for the next day's re-purpose meal. So I stick it in right after dinner and it's ready by dinner the following day.

When you've hit your time, taste and adjust for salt. Usually I cook my broth salt free (only the salt that was in the crockpot from the seasonings first is in the broth as it cooks) and add it when I need it, if it needs it. There are some seasonings that are salty enough.

If you aren't going to use the broth at the moment it's done, strain it with a find mesh strainer (press all the carrots into mush, it gives the broth a great color), allow to cool, then store in fridge or freezer. Just be aware that if you store in glass jars the broth expands and WILL shatter all over your freezer. BTDT. So I love to store my broth in large muffin tins then pop out when frozen and store in another container. Then I have 1 cup portions to play with.

But we are going to go right into tonight's re-purpose meal!


Second day: Chicken and Rice Soup

Once your broth is done, this meal comes together only the time it takes for the rice to finish cooking. Note, this will make two days meals! It makes a bunch! Enough to feed 10-12 people.

What you will need:

The broth you just made (or 8-10 cups of broth and water)
Left over chicken from yesterday
Left over rice from yesterday (or 2-3 cups dry white rice)
4-6 thin sliced carrots
2 ribs of celery (sliced thin)
1 onion (sliced thin)

Directions when using leftover rice:
To a large stock pot add: the broth, onion, and your veggies.  Turn the heat on high and bring to a boil. AS soon as it starts to boil, set your timer for 10-15 minutes and check your carrots for doneness. When they are just al dente, add in your left over rice and chicken. Once warmed, the soup is done.

Using left over rice makes this a nice comforting soup. When making the rice inside the soup, it's much thicker and more hearty.

Directions when using dry rice, not leftover:
To a large stock pot add: the broth, onion, and your rice.

Turn the heat on high and bring to a boil. AS soon as it starts to boil, add in your carrots and celery, stir and cover until rice is done and tender.

If you use only have minute rice, do not add the rice until the carrots are tender. Alternately, you could add your rice after the carrots are tender. Cover and remove from heat to finish. Though I don't suggest that.

When the rice is almost done, check your broth level. Sometimes I have to add some water to keep it a little more soupy, and some times I don't. This isn't soup like chicken noodle, but it's more hearty with little liquid, but enough to call it soup.

Just before the rice is done, put in the leftover chicken and once the chicken is warm, it's done!

My kids absolutely love this meal and we have it at least once a month (if not twice) in the winter and at least once in the summer.

Second day: Chicken Tacos

This is another second day option and very easy. All that chicken you cut into bite sized pieces makes a perfect base for chicken tacos. And the rice is perfect for a quick Spanish rice.

What you will need:

Leftover chicken
Leftover rice
Taco seasoning
1/2-1 cup of salsa
1/2 -1 cup of chicken broth you just made
flour or corn tortillas (alternately you can buy your own pre-made taco shells)
frying oil
veggies for tacos (lettuce, tomato, onion, cheese, avocado, etc)

Combine leftover rice in a pan with chicken broth and salsa. Mix well and sprinkle some taco seasoning over the top. Just enough to color the rice and give it that Spanish flare. Turn on low and let it warm slowly as you put together the rest.

Also sprinkle the left over chicken with taco seasoning. Don't be heavy handed as it can get extra spicy!

Add oil to a pan and once hot enough, using tongs, drop in one corn tortilla. If it starts sizzling immediately, you know you have a good temp. If it just kind sits there, your oil might not be hot enough. Turn the tortilla immediately and fold over like a taco shell. Cook a minute or so on each side then drain on paper towels. I usually spread the first shell apart with my fingers and stack the rest upon it so that they don't dry closed! Nothing worse then a perfect shell that has dried closed.

You can do the same to the flour tortillas but note the inside doesn't get crispy so it's almost like a gordita shell. My husband (who isn't wheat intolerant) loves them.

Once you are almost done with your shells, add some oil to a pan and once hot, add the left over chicken that you've sprinkled with taco seasoning. Fry it up until warmed through.

When everything is warmed and done, put some meat, some Spanish rice, and cheese in a taco shell and let the picky eaters decide what veggies they want on it.

If you don't fry your own shells, this meal takes less then 10 minutes (start to finish) to get on the table.

Hope you found this interesting. I just did BOTH of these this week, so I thought I would share. I have more re-purposed meals I will share as the days go by.

Last night we had ranch pork chops from the crockpot (Dry ranch mix, chicken broth, pork, that is it) served with steamed veggies and a corn pasta. I layered it all on a plate and covered it in a marinara and called it Hobo Pork Primavera. It was fantastic. So tonight I have left over Ranch Pork I'm going to make some fried rice out of. Re-purposing is so fun!

Thursday

Chick-Fil-A Copy Cat Nuggets (Grain Free)

Earlier in the year my grain free friends were raving about this amazing copy cat recipe for Chick-Fil-A nuggets. But like any good friend, I was a doubting Thomas. I love  Chick-Fil-A and saying you have an amazing grain free copy cat recipe is just pretentious. Right?

Well, I'll eat crow now, because holy amazing... it is just that. And without the grains to bog it down, I don't get a belly ache after eating 500 pieces.

 Chick-Fil-A nuggets

Youll Need:
2 lbs boneless, skinless chicken breasts
1/4 cup dill pickle juice
1 egg, beaten
2 tbsp buttermilk or cream (coconut milk okay)
1/2 cup tapioca starch
2 tbsp paprika (smoked paprika kicks it up a notch)
2 tsp each salt and black pepper
1 tsp garlic powder
2 dash ground cayenne pepper
1/2 cup coconut oil for frying

  1. Combine the chicken pieces and pickle juice in a resealable plastic bag or large enough pyrex container that the all the pieces can marinate. If needed stir often to ensure every piece soaks up some yummy juice. Marinate for at least 1 hour to get that key taste but you can marinate over night.
  2. When the chicken has finished marinating, strain it through a colander to drain out the extra pickle juice. Put the chicken back into the bag and cover with buttermilk and beaten eggs and allow to sit a few minutes. Alternately you can just put it all into a bowl and draw out the chicken when you coat it.
  3. As the chicken marinates again, prepare your breading by combining the starch, paprika, black pepper, and salt. Usually I combine this mixture in a sheet pan so I can dredge the pieces quickly and pile up on the side. 
  4. Preheat your oven to 250F for keeping the pieces warm you finish.
  5. Melt coconut oil in a cast iron skillet (or high pot to prevent splatters) over medium heat for 3 minutes. Resist the temptation to add more oil then called for. The oil should reach halfway up the chicken pieces while cooking but not cover the pieces. You can add more oil if needed while cooking.  Be sure to watch the heat, as the skillet will get warmer over time; adjust heat as needed. Youre looking for an oil temperature around 350F.
  6. With your fingers, dredge chicken, then carefully add it to the oil. Repeat until you have filled your skillet; be careful not to overcrowd. Resist temptation to move the chicken before 2-3 minutes has passed. This will ensure a beautiful crispy coating! Turn and allow to cook another 2-3 minutes (depending on the size of your chicken) or until done.
  7.  Place the cooked pieces on a plate lined with paper towels and put them in the oven to stay warm.


Wednesday

Shepherds Left Over Chicken Pie

INGREDIENTS
Extra Virgin Olive Oil
1 cup assorted chopped vegetables
2 cups chicken, pulled or chopped
1 cup gravy
1 cup chicken stock
1 1/2 - 2 cups mashed potatoes or sweet potatoes
1/2 cup of cheese

PREPARATION
Preheat oven to 350F.

Pour gravy and stock in a sauce pot over medium-high heat until it comes to a bubble.

Over medium-high heat, saute some oil and vegetables until softened, about 3-5 minutes. Turn off heat and add chicken and gravy mixture to the vegetables and toss to coat.

Pour pie filling in a casserole and top with potatoes and cheese if desired.

Bake 20-25 minutes until golden brown and bubbly.

Thursday

Chipotle Cilantro Lime Chicken

Another whole bird crockpot win!

I'm seriously loving this probe and my crockpot right now. I don't know why I haven't considered using the probe on all my poultry before, but I'm a changed woman. All the birds from the pot have been juicy and delicious! It might be able to be seasoned with just plain salt and pepper and I'd think it was amazing. Though, I do love me some spices. So maybe that is going too far.

For those of you who want to know what crockpot I refer to, here is the link:
(Hamilton Beach 33967 Set 'n Forget 6-Quart Programmable Slow Cooker)

Anyway, I am going to cry the day this baby goes to slow-cooker heaven.

By I digress...

Chipotle Lime Chicken. Yumm! And spicy to boot! I mean like, I needed some veggies with every bite. But I'm a weenie. My husband and kids thought it was amazing and not too hot. So it's probably a medium-hot recipe.

Here is what you will need:
Two large freezer bags. One labeled with Chipotle Cilantro Lime (cook on low 5-6 hours)

Cut 1 lime in half and place in the cavity of the chicken. Then put it in the unlabeled bag.

Now get your food processor out and add the following:
1/2 cup of lime juice (about 2-3 limes). Did you know if your microwave your limes for 20-30 seconds the limes are easier to juice? Try it.
1 bunch of cilantro
3-5 cloves of garlic
1 tbsp of olive oil
1 tsp black pepper
1 tsp sea salt
1 tablespoon of Chipotle powder,
1 table spoon of ground cumin

Whirrrrrrr this until it's paste. I added a little more olive oil then asked for, mostly because it wasn't pasty enough yet. 

Now put half the mixture in the front of the bag and half in the back next to the chicken. Then seal it tight. Like get all the air out of that bad boy. If you have  seal a meal, now would be the ULTIMATE time to use it. Once the air is out, move the pasty mixture all around the bag to cover every part of the chicken. 

Once you make sure again all the air is out, put it in the labeled bag and freeze.

Be sure to defrost a full day in the frig before you cook it. So, 24 hours. Take it out the night before or else you will have a half frozen chicken! No bueano! 

Place your chicken in your slow cooker along with any marinade left over in your bag (I scraped mine clean). Cook on low for 6 to 8 hours. I would recommend closer to 6 with a probe. It will be glorious.
And the more bits you scoop from the crockpot and put onto the meat, the spicier it will be. But sooo good.

Monday

Mouth-watering Smokey Yummy-Goodness

Note: My original post is lost in space... but luckily there was a draft saved. So this isn't the whole thing, but it's close.

This recipe used to be called: BBQ Crock Pot Chicken but that title does not suit this chicken. Details below.

Oh goodness. You will not believe this recipe. So easy. So awesome. Finger licking amazing. I'm not sure I would call it BBQed anything but trust me when I tell you this chicken will be my forever go to when company is coming. So easy. So tender. So delicious. So amazing.

So serious.

I don't know why the original person called it BBQ. Maybe because it's red? Maybe because the sauce in the pot when it's done looks reminiscent of BBQ? I'm not sure, but whatever it was, I've renamed it to Mouth-watering Smokey Yummy-Goodness. Catchy right?

Also, this isn't your typical freezer meal... it's better. Because you seriously only need three things on hand. The chicken (grab some whole chickens and put them in your freezer for when you need them), the onion (you can pre-slice and freeze in pouches, but be sure to double bag to keep the stench contained;)), and the  spices (again, you can premix this. I am actually thinking about making a huge vat so that I have it on hand to add to anything I want). LOL Because it's that good. Seriously. This is my new go-to meal for company. Seriously. Delicious!

Ingredients
 1 whole chicken, giblets removed and cleaned
 1 white onion, sliced
 2 tsp smoked paprika
 1 tsp sea salt
 1 tsp onion powder
 1 tsp dried thyme
 1 tsp white pepper
 1 tsp chipotle powder
 1/2 tsp garlic powder
 1/2 tsp black pepper

Instructions
Line the bottom of your crock pot with the sliced onions and place the thawed chicken on top.


Combine all remaining ingredients in a bowl and mix well.

Using your hands, rub mixture over the entire chicken, inside and out and underbelly too. It actually looks like I missed a spot on the leg there... I'll do better next time.

Place the lid on your crockpot and cook on low for 6 hours or until your chicken is done.

 OR if you have one of the newer crockpots like I do (I have  Hamilton Beach 33967 Set 'n Forget 6-Quart Programmable Slow Cooker), use your probe and set it to low and 160. These are the coolest things. You will NEVER overcook chicken again. You set it to 160 and stick the probe in the breast closest to the bone. And it will measure the temp of the meat every 30-60 seconds.


When it reaches your desired temp, the crockpot turns itself off and goes to warm so that it does't overcook your chicken! It's brilliant!
And after a quick look at Amazon, they are on sale this week! 

The result will be this mouth watering chicken that your family will come back asking for more! It's seriously soo good.


Tuesday

Chicken wrapped Asparagus

This recipe is so simple is should be illegal.

Chicken.

Asparagus.

Garlic.

Salt and Pepper.

That is it. No really. The first time I had this meal I was at my good friend Eryn's house. She'd pre-pounded her fresh chicken breasts and froze them between parchment... then just thawed to slap these bag boys together. Let me tell you what, I was not expecting the flavor to be as it was. In fact, when I decided to make this, I  made a gravy just for my husband... because he needs flavor explosions. But it was good enough to not need it (though he used it anyway).

So, how then can we make this into a freezer meal? Quite simple. Assemble ahead of time and wrap in foil and VOILÀ, you have prepackaged go to meals. And goodness are they easy.

What I used:
4 chicken breasts
1 head of garlic (more like 4-5 cloves)
2 bunches of asparagus (snapped at the bend)
Salt and Pepper

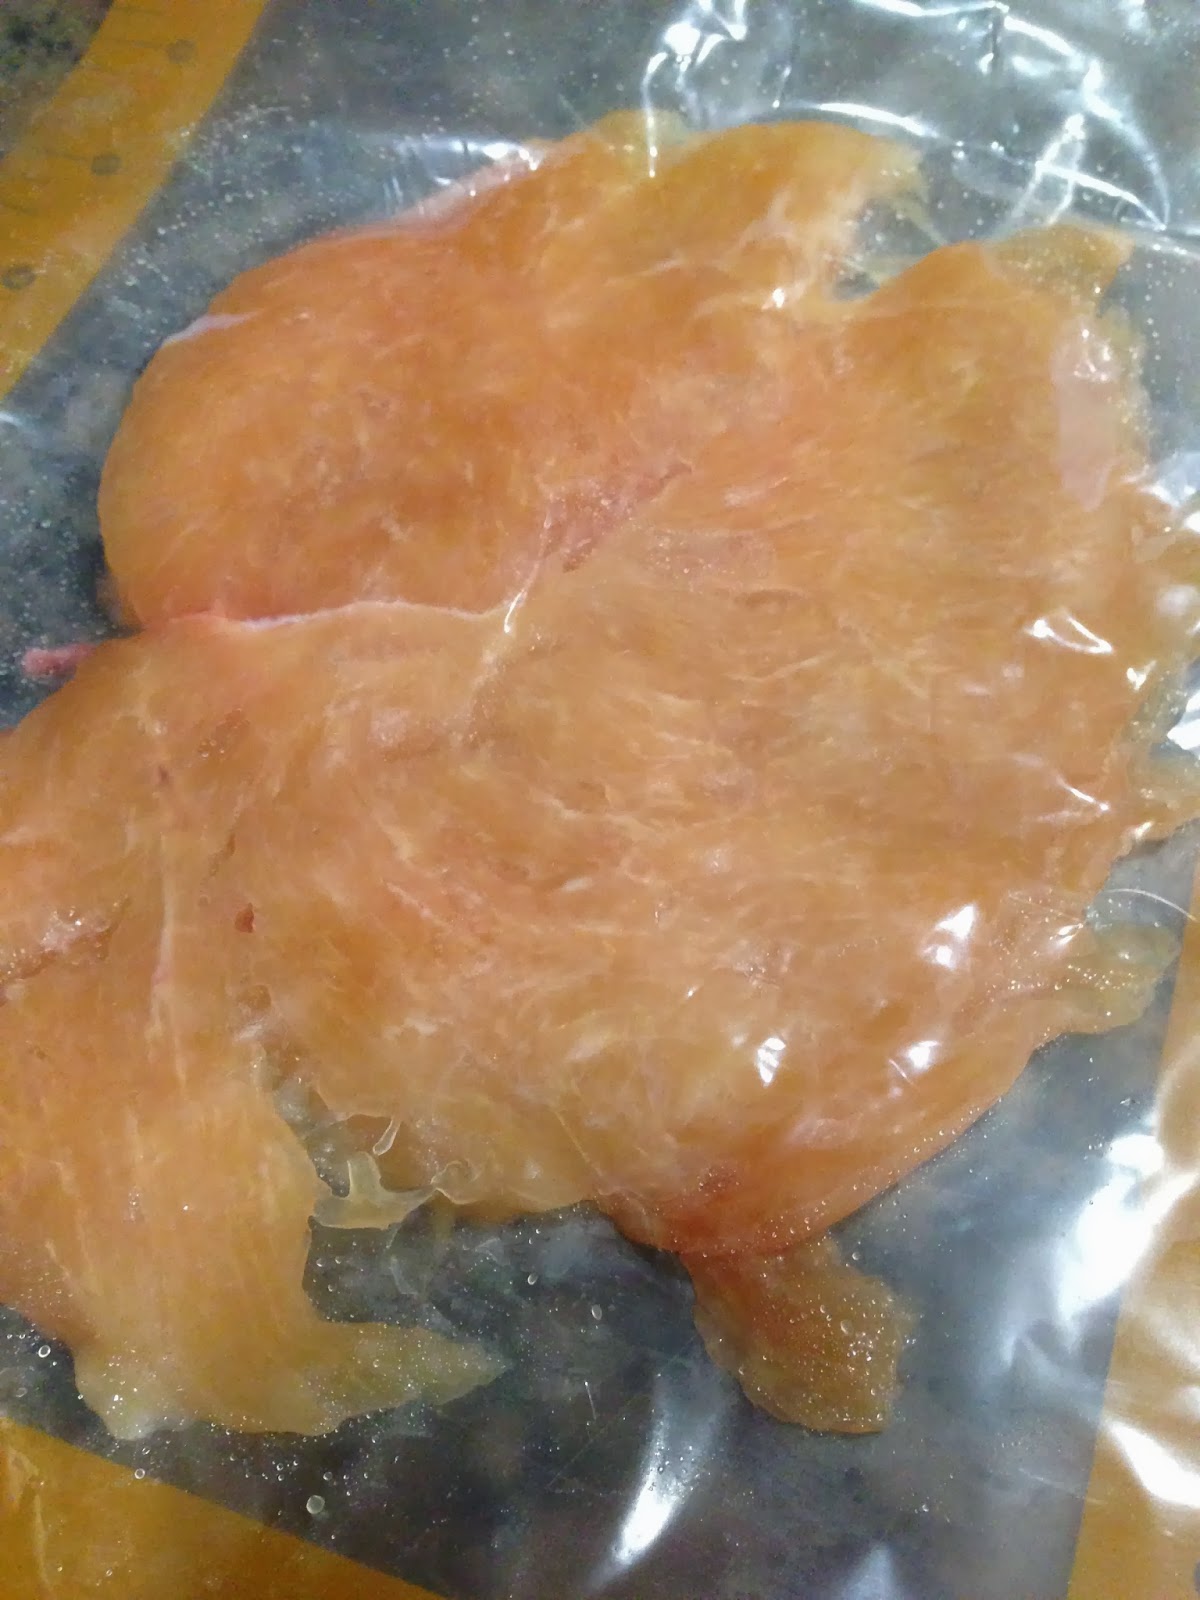
First off, you have to get the chicken thinner then then fat ole chicken breasts. Now, I've never EVER ever filleted a chicken breast so, this had me a bit nervous. But I just used a VERY sharp knife (sharpened it immediately before) and went to cutting. Surprisingly it wasn't as bad as I thought it was. 

I then stuck the chicken breasts INSIDE a plastic bad and pounded the heck out of them with an ice cream scoop. I know, I think I'm supposed to use a mallet, but I'm improvising here. I beat mine to pretty thin but not so thin it's falling to bits.


Then I stuck 5-6 sprigs of asparagus into the middle... chopped some garlic and placed it over the top. Salt and peppered it, then just tied it shut with kitchen twine.

Aren't they pretty?

Don't look at the one closest to the camera. That was my FIRST TRY in which I learned that beating chicken too hard will result in chaos for both you and the chicken.

Now it's time for you to wrap EACH of these INDIVIDUALLY in foil. Then put them in a bag labeled Asparagus Chicken.

Thaw them in a pan or dish in the frig the night before, then unwrap and cook one of the follow two ways:

Oven: 350 for 35-45 minutes until just a bit golden
Crockpot: coat inside of crockpot with coconut oil (just a little so that is prevents sticking) then line the bottom of the crockpot with your chicken wraps. Cook on low 4 hours.
That's it! And it's so good!

Next time I'm going to try this... wrapped in bacon!

Monday

Garlic Crockpot Chicken

When I found this recipe, the blogsite hostess said, "If you do not like garlic, do not try this recipe." I love garlic so of course I am going to try this!

However, what the blogsite hostess failed to say was that not only do you have to LOVE garlic, but your neighbors have to love it. Your children have to adore it, because it will permeate every piece of clothing in the room on their bodies. And your husband better enjoy bathing in it. I mean seriously. You have to LOVE LOVE LOVE garlic.

I thought I loved garlic. But this lends itself to a new kind of infatuation. I mean really. REALLY.

SO I'm going to say the same thing, only amended. Ahem.

Only make this chicken if you have a very unhealthy LUST for garlic. Because that is all you taste. Just garlic. So, let that be your warning.

Moving on.

So my thoughts on this bird were not only that it could have not been sooooo flippen garlic-y, but that there was hardly any flavor in the meat itself... well maybe there was flavor but it was masked by all the garlic! So, right. If you like garlic flavored everything and a house that smell like garlic two days later, this is the bird for you. No vampire attacks here this week.

What you will need: 
2 gallon sized freezer bags
1 quart sized bag
1 sandwich bag

Write on the outside of bag 1, 40 Clove Garlic Chicken - Low 5-8 hours (depending on bird size)

Put 1 whole chicken, rinsed and patted dry, giblets and excess fat pockets removed inside the gallon sized freezer bag. Cut a lemon in half and stick it INSIDE the cavity of the chicken and seal the bag.

In sandwich bag put 1-3 tsp of each of the following spices (depending on bird size):
marjoram
sage
rosemary
thyme
salt and pepper
and smoked paprika (I put more like a tablespoon or two cuzz I love that stuff ;))

In the last bag you are going to put about 40 cloves of unpeeled garlic (I used 5 heads and no I didn't count the garlic pieces I just said, looks good). You need to NOT peel the garlic because in the slowcooker they will absolutely turn to mush and not be what you want. So make sure to get them in their peels. TO do this I just whacked the side of each bulb with the side of my knife and then they fell into pieces. I did remove most of the flakey bunk.

Seal all the bags and stuff them into the main bag and into the freezer it goes.

The day before you cook it, make sure you thaw your bird out WELL! No frozen birds in the crockpot, please. Dries out the meat. And don't think you can turn it on high just to make amends. Just don't do it. 

Place cloves in the bottom of the crockpot. Next put the chicken over the top (Breast side up) and then sprinkle with all the spices. That is it. Set the crockpot and come back in 5-8 hours to see the results.

When it's done, you can get the color you want (that you can't get in a crockpot) by separating the chicken into individual pieces (breast, wings, leg quarters) and broil them on a baking sheet for a couple of minutes. Makes the skin crispy but makes an awful mess too ;)

You can use the drippings inside the crockpot to make gravy or mix into your cauliflower potatoes. But expect ultra garlic.

I apologize for no pics of the finished bird. My kids were so starved I just worried about my own safety and not a pic. No one (but my husband) complained about the meal... but no one had seconds either. And later it was agreed it was wayyyyyy too garlic-y. Okay fine. It was 40 clove garlic chicken. Lesson learned. I don't lust for garlic.

The bird itself had little flavor as well. Possibly because our nostrils were overrun with garlic but... it just wasn't a huge win. But someone who loves Garlic (with that unhealthy love) will love this too.

Friday

Chicken Pad Thai

Paleo friendly freezer meal number two. And so far, I'm feeling pretty confident about these recipes.

And really, how can Pad Thai that is Paleo Friendly be a bad thing... even my picky twelve year old ate it. I'm hankering for more to have for dessert. No really. SOOO GOOD.


What you will need:
2 gallon sized freezer bags
2 quart sized bags
1 Sandwich bag

Write on outer gallon bag: Chicken Pad Thai (needed day of cooking: coconut oil, cilantro, lime wedges, cashews and siracha)

Label gallon sized bag (#1 Chicken Mixture) put in  the following ingredients:
1.5lbs chicken, (Cut into bite sized chunks)
5 cloves of garlic (chopped finely, I used the PC garlic press)
1 bunch green onions (only the white ends and a it of green. Save rest for later)
Salt and Pepper
1 TBS of Ground Ginger

Shake the bag well to mix all the ingredients together. Place into outer bag.

Label quart sized bag "#2 Sauce" put in  the following ingredients:
3 TBS of Fish Sauce
1 TBS of Coconut Aminos
1 cup coconut milk
1 cup chicken stock
3 Heaping TBS of Sun Nut Butter

Squish bag well once sealed and put into outer bag.

Label quart sized bag "#3 Veggies" put in the following ingredients:
2 carrots (washed, peeled, and sliced thin like noodles.I used my potato peeler to get thin slices)
2 zucchini (washed, peeled, and sliced thin like noodles.)
1-2 cups of Bean Sprouts (optional but sooooo good)

Label sandwich bag with "add after" and put the remaining green onions.

Have on hand the day of cooking:
Coconut oil
Cilantro
Lime wedges (Optional)
Cashews (Optional)
Siracha (Optional)

When it's time to cook your meal, thaw in the frig the night before.

To cook:

1. Heat wok or large frying pan on med-high. Add bag #1 to the skillet and cook chicken completely.

2. Next add #2 Sauce and mix well. Bring to slow simmer.

3. Next add #3 Veggies, but only set the veggies just on the top of the bubbling mixture. You want to steam them not boil them. Allow the mixture to steam for 3-5 minutes or until your veggies are cooked the way you prefer.

5. Serve with or without the broth but top with the "add after" green onions. This is also the moment you would top with cashews, siracha, and fresh squeezed lime. Add the siracha for an extra KICK!

YUMMMMM! We will make this A LOT! It was such a hit!

And there are crockpot directions! So you can either do this meal immediately, go in the freezer for later then on the stove (cooks up in 10 minutes), or allow your cockpot to do the work.

WIN!

Crockpot directions


What you will need:
2 gallon sized freezer bags
1 quart sized bag
1 Sandwich bag

Write on outer gallon bag: Crockpot Chicken Pad Thai (needed day of cooking: cilantro, lime wedges, cashews and siracha)

Label gallon sized bag (#1 Chicken and sauce mixture) put in  the following ingredients:
1.5lbs whole chicken breasts
5 cloves of garlic (chopped finely, I used the PC garlic press)
1 bunch green onions (only the white ends and a it of green. Save rest for later)
Salt and Pepper
1 TBS of Ground Ginger
3 TBS of Fish Sauce
1 TBS of Coconut Aminos
1 cup coconut milk
1 cup chicken stock
3 Heaping TBS of Sun Nut Butter

Squish bag well once sealed and put into outer bag.

Label quart sized bag "#2 Veggies" put in the following ingredients:
2 carrots (washed, peeled, and sliced thin like noodles.I used my potato peeler to get thin slices)
2 zucchini (washed, peeled, and sliced thin like noodles.)
1-2 cups of Bean Sprouts (optional but sooooo good)

Label sandwich bag with "add after" and put the remaining green onions.

Have on hand the day of cooking:
Cilantro
Lime wedges (Optional)
Cashews (Optional)
Siracha (Optional)

Cooking directions: Thaw in your frig the night before.

Add Chicken and sauce mixture to the bottom of the crock pot. Try to get everything out of the bag, because this sauce is sooooo good. ;)

Now carefully set your veggie noodles on top of your liquid and meat base.We want them steamed not stewed.

Cook for 3.5 to 4 hours on low if you are using a 4-Quart Slow cooker.

Cook for no more than 6 hours on low (5 is ideal) if you are using a 6-Quart slow cooker.

Remove your chicken and slice into bite sized chunks. Throw it back into the crockpot and stir it p. There will be lots of broth, but if you use a pasta spoon, you should get just the right amount in your bowls. You can always ladle in more.

Top with cilantro, green onions, cashews, and a squeeze of lime. Add the siracha for an extra KICK!


Crockpot Fajitas

I absolutely love fajitas, so when a freezer friendly recipe enterened my vision, I was all there.  It's so simple it's almost illegal! I kept thinking, why didn't I think of this?!

Ingredients for the Ziplock:
  • 1 lb of Whole Chicken Breasts (or any meat will work)
  • 3 Peppers (Green, Red & Yellow), sliced
  • 1 Onion, sliced
  • 1 Tablespoon chopped/minced garlic 
  • 1 Package of Taco Seasoning (or you can make your own recipe here. )
  • 1/2 cup of chicken broth
Throw everything into the zip lock and seal. That's it.

Instructions for cooking:
When you take it from the freezer you have two choices, dump in the crockpot frozen (just will take a little longer) or defrost in your frig the night before. Now, because I hate cut onion stinking up my frig, I always stick mine in frozen. Though if you double bag your meal, you won't have this issue.
  1. Pour the contents of the bag into the crockpot and cook on low for 6-8 hrs (or high for 3-4)
  2. Serve with tortillas and all the toppings - sour cream, guacamole, cheese, lettuce, etc.
Of course there are no photos because when the food is ready, the natives are restless and usually it's only after it's devoured that I remember I needed a photo. So, I am making this on Superbowl Sunday and will supply pictures at that time.

(Updated to say: Super Bowl Sunday came and went and no one thought of taking pics. Go me us. However, I know for a fact this is going to become a staple in this household because the kids [all three of them] asked for the leftovers on more then one occasion on separate days. So that is a total win.)

Monday

Curry Beef with Quinoa

I've always steered clear of curry. I'm not sure why, maybe the other ingredients that you put WITH the curry made me nervous. I mean it's not every day I'm asked to add a spice in a foreign language to my crockpot. Nor anything resembling elmers glue! So, I'm sad to say I'd never tried to make curry anything until today.

Now I'm happy to report that it was not only a successful dinner, but a successful freezer meal as well! Hooray! Which means, of course, it will be chronicled here. So I can make it again and again.

Ingredients:

3lbs of tri-tip cut into large chunks (or some other meat you want to curry. I'm quite certain this will work splendid with chicken, which I will try!)
1 1/2 tablespoons curry
1 1/2 teaspoon garam masala
Lots of garlic. I used about 1/4 cup of chopped garlic (or one WHOLE large head of garlic chopped or pressed thru a garlic press) It looks like too much, really it does. But it's not.
1 large onion, diced
1 (13.5oz) can coconut milk
2 Gallon sized freezer bags

Freezer Directions:


Add coconut milk (everything in the can! Even the glue stuff-- lol) to one gallon sized zip lock bag. Smoosh it up with your hands and mix up all the yummy milk.

Add to the same bag all the onions and garlic and smoosh it up good. See the theme here? No dirty dishes!

Next add some cut meat then some of the spices. Then more meat, more spices, until you are done with all the meat and all the spices.

Immediately press the air from the bag and seal it up. Place in additional zip lock (to prevent leaks when it defrosts).

Cooking:

The day before you want to stick it in your crockpot, take it out and allow it to thaw in your refrigerator. Just before you stick it in your crockpot, run the bag under some warm water to get the hardened coconut paste off the sides of the bag then pour it into the crockpot. If you still feel like you were cheated on bits sticking to the sides of the bag, run the closed bag under hot water again until they all shake free. Then cut a tip in your bag and pour the bits into the crock.

Note, it won't look very good. But it will smell and taste amazing.

Cook on low 8 hours or high for 4-6 hours.


I made beef Quinoa with my Curry Beef, which also tuned out delish! So here is that recipe.

1 cup quinoa
2 cups beef broth
1/4 teaspoon salt
1 tablespoon olive oil

Rinse quinoa well. Heat sauce pan on med-high with olive oil. Dry out the quinoa in the olive oil as best you can. This gives it a little more nuttier of a flavor and my kids said they loved it far more then plain quinoa. Add beef broth and bring to a boil. Cover and cook on medium about 15 minutes or until most of the broth is absorbed. Take off the burner and let sit for 5 minutes. Fluff with a fork.

Tuesday

Stork Meal 13: Mediterranean Caprese Chicken

This is one of those times that I have to give credit to Google for helping me find (then adapt) a recipe.

The original game from Our Story, but for whatever reason, when I found the picture on pinterest, I could not get any links to work. Regardless of WHO pinned the darn thing, the recipe would not come up! And I tried like 15 boards! Argh!

I might have panicked a little, because the Mama-to-be doesn't have many requests, but this was one of them. And as a self-proclaimed chef in training, I needed this recipe and thankfully Google knew where to find it. After only a few search strings, I found Aaron and Jill's blog and read through her recipe.

But like I always do... I changed the snot out of her recipe. I took out the sugar, added the onion and garlic and didn't drain my artichokes.  Upped the temp, lowered the cooking time and I also added way more cheese then she did... but we like cheese. A lot. And, while I haven't tried freezing this yet, I'm almost certain it will freeze beautifully!

The results were frighteningly good! We served ours over Quinoa but you can serve over pasta or rice. We had a two-year-old eating and two picky 9-11year olds and everyone loved it!

Here is my recipe:

Ingredients:
6 Chicken Breasts
8-16 shredded mozzarella cheese
Fresh Basil
Salt
Pepper
Olive Oil
1 heaping tablespoon of garlic
6 large diced roma tomatoes
1 white onion
1 large jar of artichoke hearts
1/4 cup quinoa flour (or any flour but I am wheat free so I used quinoa)

Directions: (Preheat 375)

1. Slice onion and keep the onion in rounds. Lay the rounds on the bottom of a 9x13 pan.

2. Place well salted and peppered raw chicken breasts over the top of the onion.

3. Mix together; tomatoes, whole jar of artichoke hearts (with liquid), garlic, some olive oil, generous salt and pepper, and the flour. Pour in pan between the chicken.

4. Bake for 35 minutes or until the internal temperature of the chicken hits just about 135-140.

5. Mix chopped basil (generous amount) and shredded mozzarella together and cover the mostly cooked chicken. Put back in the oven and continue to bake until chicken reaches 160ish. Flip on the broiler for 3-5 minutes to brown the cheese.


Freezer directions: Because of the nature of this meal, you would need to make this in a freezable 9x13 container like pyrex or throw away foil. Follow all the instructions to assemble but instead of cooking, cover with foil (or your lid). Bag cheese and basil mixture and place it on top of the meal with siran wrap.

Label with: Bake 375 for 35 minutes. Top with cheese mixture. Bake additional 10 minutes. Serve over a starch.

I will try this recipe again with a mock caprese (for my non tomato eating body) and use roasted red peppers. I think it will be amazing... but I will let you  know when I try it.

To see the other Stork Meals, click here.

Saturday

Stork Meal 11: Chicken Bites

For those of you just tuning in, if you aren't sure what a stork meal is, it's a meal for a new mamma! One that can go in the freezer and not be a big hassle to fix, specially with a new baby in the house. I'm doing this Stork Meal series for my sister, whose first baby is due in 3 short weeks! I plan to have her freezer stocked to the gills!

To see all the previous stork meals, you can go here. Otherwise, read on for today's winner.

This was one of those meals that we totally forgot to take the picture of until it was almost completely consumed. Which means, it of course goes right onto the blog. I found the original recipe on Pinterest, but as any good chef does, I did mess it all up with the flavor of ME. And we loved it. There are no leftovers.

Here what you will need:
3/4 Cups of Ketchup
1 Cup white vinegar
2 Tablespoons of Soy Sauce
2 Tsps of liquid smoke
1 Teaspoons of onion salt
1/2 cup of brown sugar
2 tablespoons of chopped garlic
1 tablespoon prepared mustard
Salt/Pepper
5-6 Chicken Breasts cut into large bite sized chunks

Put all sauce ingredients in large zip lock bag. Mix well then add the chicken bites. You're done.

Write on the bag: Pour into oven dish. Bake on 375 for 35-40minutes.

WINNER!

To see the other Stork Meals, click here.

Tuesday

Stork Meal 9: Sour Cream Bacon Wrapped Chicken

Oh. My. Heaven.

So, I haven't even tasted this recipe (as I begin write this, but I tasted it by the end) but the smell in my house makes me want to do a little jig. I mean seriously people, I don't know what is more exciting. The fact that I have bacon in my crockpot or that it's wrapped around juicy chicken and covered in a smoked paprika cream sauce. Seriously folks, my nose is in heaven. And I have 8 people coming for dinner who will be the judges of it's fantasticity (That is totally a word)!

And now that I've tasted it... Oh yeah. This is a total keeper. So here is what you must do, run (don't walk) to the store and buy these ingredients:

Thick sliced bacon
4-5 boneless skinless chicken breasts (you can use thighs too)
2 cans of Cream of Chicken (or you can use mushroom if you prefer, but my kids prefer I don't)
1 cup of full fat sour cream (you already have bacon, come on you really going to use FF?)
2-3 Tablespoons of Smoked Paprika
Garlic Salt (or you can use real garlic [1-2 crushed cloves], but my kids prefer I don't)
Pepper (and salt if you don't use the garlic salt)

For preparation to go in your crockpot today: Wrap defrosted chicken in bacon and place in the bottom of a preheated crockpot. I usually turn mine on high then back to low when I'm all putting it in. Mix the soup, sour cream and all the spices together and taste, adjusting for your liking. Some days I need more paprika... some I need less. Depends on how snarky I am I think.  Pour well combined yummy sauce over the chicken in the crock and cover. Cook on High 4 hours or low 6-8 hours (until chicken is at 165). Serve over rice or noodles. Steamed carrots will be excellent with this meal.

For the freezer: Wrap frozen chicken breast in bacon and pack tightly into the bottom of a gallon sized zip lock bag. In another gallon bag combine Cream of chicken, sour cream, paprika (start with 1 table spoon first, taste and then add more to your liking), Garlic salt (again taste and see), and finally some pepper. Seal bag and mix well by squishing the bag many times. Make it all the same color. Taste and adjust to your families liking.

Store sauce and bacon wrapped chicken together in an additional freezer bag and label with this: Place chicken in the crockpot first, cover with sauce. Cook 4 hours on high, 6-8 on low. Serve with rice or pasta.

To see the other Stork Meals, click here.

Stork Meal 7: Cilantro Lime Chicken

Ohhhh yummy. It would have been even better with dark meat, but goodness was this meal great.

I wish I could remember where I wrote down the initial recipe from so I could give them a shout out, but for the life of me, I can't find it anywhere in my search results!

However, I did tweak the recipe a little (I bet you are sooo surprised) so maybe they would be shocked and perplexed.

Split between two gallon zip locks:
6 boneless chicken breasts (or equivalent boneless thighs)
2 cans corn (undrained)
2 cans of black beans (drained and rinsed)
1 red onion (diced)
1 tube of cilantro (or a whole bunch of cilantro)
Juice of two limes (or about 1/3-1/2 cup of lime juice total)

2 tablespoons of cumin
1-2 tablespoon of garlic

Mash bag well to combine.

Split between two quart bags:
4 cups of rice
2 chicken bouillon cubes (crushed into the rice bag)

Put one bag of each mixture into another gallon ziplock. Seal and label:
Cilantro Lime Chicken
4 hour on High or 8 hours on low
Combine rice bag with 2 cups of water and microwave for 5 minutes

Next time I make this meal, I may add in some chopped roasted red peppers for some more color... or even some tomatoes (that I can't eat). Not that it was missing anything... I just love color ;)

To see the other Stork Meals, click here.

Thursday

Stork Meal 5: Corn and Black Bean Taco Soup

I should have mentioned that I am really quite terrible about taking a picture of the meals before they are scarfed. Usually it's because I'm in the middle of feeding one of the seven people staying in this house right now, but sometimes I click it before it goes to the left over section of the refrigerator.

And today was one of those days. I didn't even THINK about taking a picture until I was putting everything into containers for the freezer/frig... then I quickly snapped the below pic with my phone and called it good.

I do solemly swear to try to take a picture of the completed meals from now on... Did you notice the TRY word? Yeah, we will see how that goes.

Okay, so today's meal is a family favorite of ours. My good friend Jenneffer E from Ellsworth AFB, SD served this to my family way back in like 2006... maybe even 2005. I was so enamored with it that I told her I had to have the recipe. She looked at me like I had two heads, "It's left overs!"

Whaaaa??

How can something THIS GOOD and this beautiful be made of leftovers?

Over the years, I've since lost her exact words on how the recipe went, but I always remember what goes in it (always a different leftover meat) and how to enjoy it (smoothered in cheese, sour cream and chips)!

However, when I was doing some research for my Stork Meals, I came across a gals recipe that used black beans and I was like DUH! Black beans are the perfect compliment... so I added them in and if could have been any more perfect then it was, I dunno what else would have to go in it.

We didn't have any leftover meat (because this whole house is full of carnivorous folks) so I am using ground beef for the recipe.

Ingredients:
1 pound ground beef (or 2-3 cups left over meat cubed)
1 tsp olive oil
1 medium onion
1-2 Tablespoons garlic
1-2 packages of taco seasoning
2 cans of black beans (rinsed and drained)
2 cans of corn (not creamed and undrained)
2 cans of fire roasted tomatoes and green chilies  (undrained)
1 small can of diced green chilies (undrained)
8oz of tomato sauce (not spaghetti sauce)
2 cans diced potatoes (undrained)
(You will also need cheddar cheese, sour cream, and tortilla chips when serving)

Now remember I said this was a leftover meal for her? She would throw all of her leftover veggies into this dish instead of some of the above canned goods. However, she always added more!

If you are using left over meat, follow the directions below these for LEFT-OVER MEAT.

Dice onion and garlic and place to large skillet with olive oil. Cook for a couple minutes to soften the onions then add ground beef. Cook until beef is just brown and then add taco seasoning. Here is where you taste and see just how much taco seasoning you want. Remember this is going to combine in the crockpot with the liquid from the corn, potatoes and tomatoes. So don't be shy.

If you are prepping this meal for the freezer, cool the mixture and place in gallon sized bag with all the rest of the ingredients. You should have a nice full bag. Be sure to label and double bag.

Day of cooking, defrost and put in the crockpot. If you think you need more juice, add broth or just water, but usually it turns out perfect. Crockpot on high for 2-3 hours or low 4-5. Serve with fresh grated cheddar or pepper jack and a dollop of sour cream. Crumble tortilla chips into the bowl or use the chips as your spoon.

Directions for LEFT-OVER MEAT:
Because your meat is already cooked (and usually left overs at our house are chicken breasts) you don't want to put them in the crockpot for 2-5 hours and suck what remains of the juices out of them. I've tried this before, it doesn't work. You'd think being in all that broth and yumminess that it would add to... but no. So here is what you do.

Three ziplocks needed. First ziplock should be the cubed meat. Seal it and place it in an empty gallon sized ziplock. Next, add the cooked (but cooled) onions and garlic to lasts ziplock bag and then add BOTH envelopes of taco seasoning. If you use the large jar of seasoning I'd say about 1/3 of a cup. Add in all the remaining ingredients. So you will have two sealed bags. A meat bag and a soup bag inside the final ziplock.

With this version, you will cook the soup just like you did above but add in the defrosted meat in during the last 30-45 minutes, just long enough for it to become the same temperature as the mixture but NOT COOK!

Then you can eat to your hearts content... or your stomachs. ;)

To see the other Stork Meals, click here.